Steps to activate PayPal payment gateway on your Linker.store
Ecommerce
213 week ago — 5 min read
In this guide, we will walk you through how to activate the PayPal payment gateway for your online store. Before you do so, ensure you have completed your store setup. Here’s a detailed guide on setting up your store for free.
To activate PayPal follow these steps
STEP 1
Login to your GlobalLinker account.
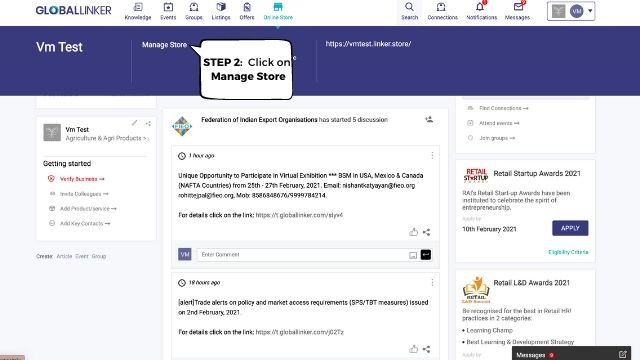
STEP 2
Click on the Online Store tab at the top. Click on Manage Store.
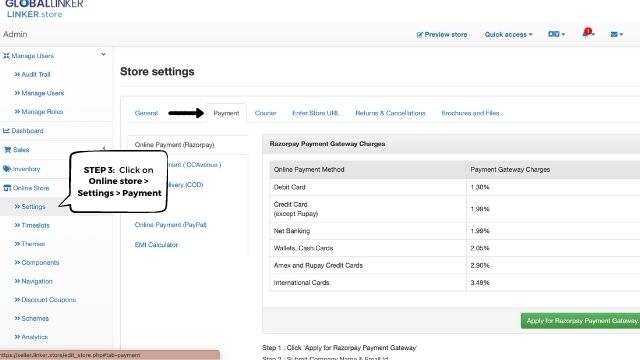
STEP 3
You will be directed to your seller panel (the left bar on your dashboard). Click on Online Store > Settings >Payment tab.
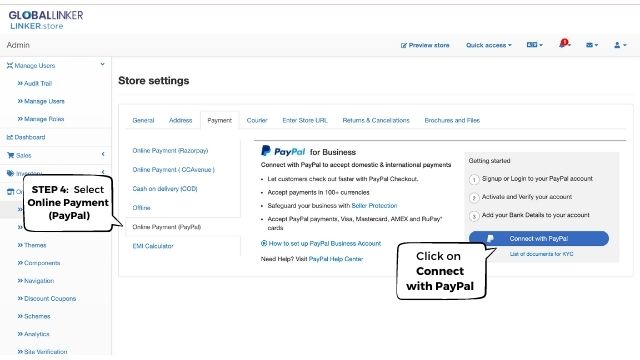
STEP 4
In the Payment tab, select Online Payment (PayPal) and click on Connect with PayPal.
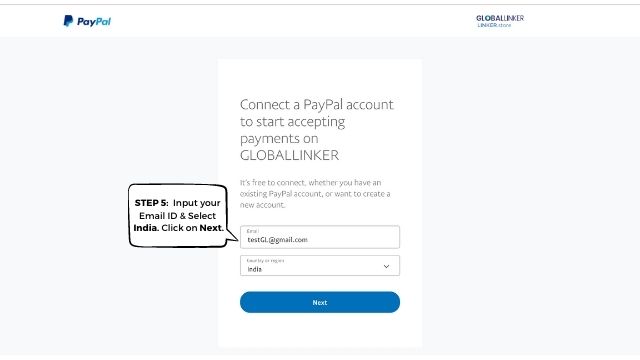
STEP 5
A new window will open. Input your email ID, select India from the drop-down and click on Next.
Note: Please ensure you have access to this email ID as it needs to be verified to activate your account.
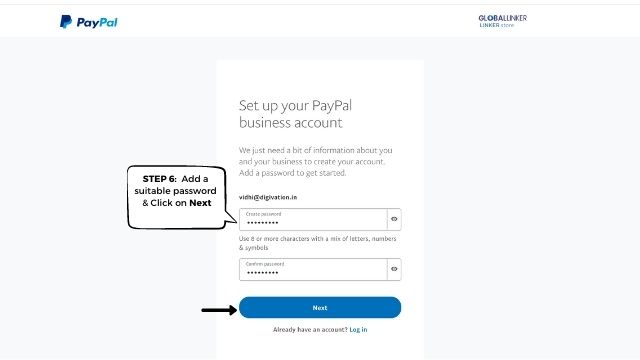
STEP 6
Add a suitable password for your PayPal account. Click on Next.
Note: The password should be a minimum of eight characters and have at least one special character and one upper case letter. Don’t use consecutive numbers such as 1234.
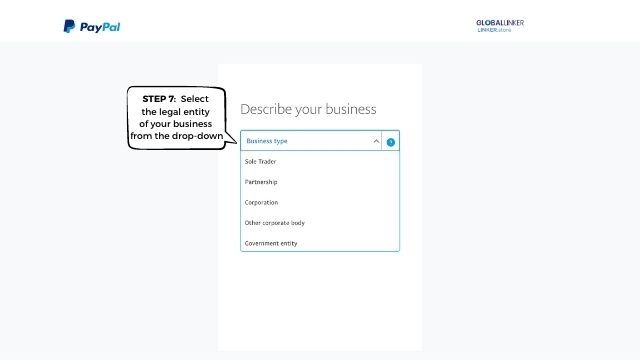
STEP 7
Select the appropriate legal entity of your business. E.g. proprietorship, partnership or private limited, etc.
STEP 8
Once you have selected the business type (legal entity), fill in the remaining fields.
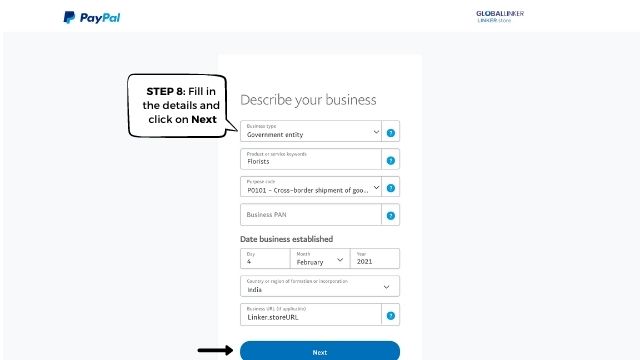
Product or service keywords: Type the name of the primary product or service you offer.
Note: As you start typing, a dropdown will appear. Choose an appropriate option from the dropdown.
Purpose code: Select P0101 - Cross Border Shipment of Good and Services.
Personal PAN: Type in your personal PAN number.
Date business established: Type in the date of business establishment. (Not applicable for a sole proprietorship.)
Country: Select India as a country of business incorporation. (Not applicable for a sole proprietorship.)
PayPal Statement Name: Type in a suitable PayPal Statement Name. It can be your business name or its abbreviation. E.g., for Star Exports, it can be STAREXP.
Business URL: Type in or copy-paste the URL of your online store.
Click on Submit.
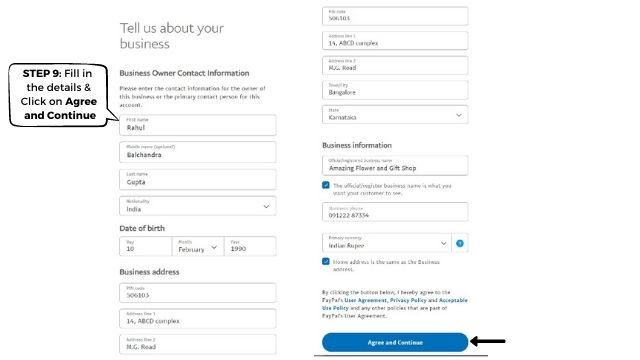
STEP 9
Fill in your personal details and click on Agree and Continue.
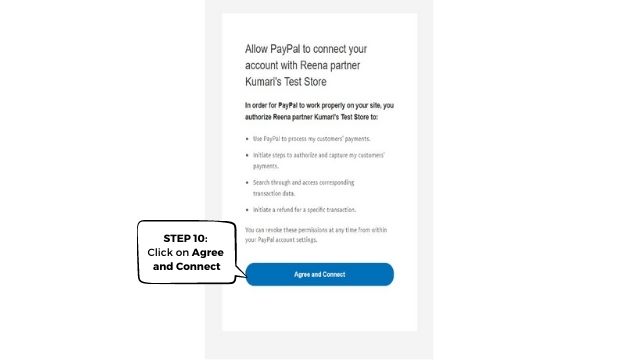
STEP 10
Click on Agree and Connect.
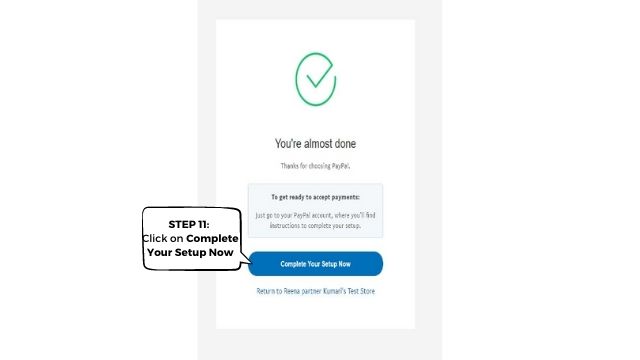
STEP 11
Click on Complete Your Setup Now.
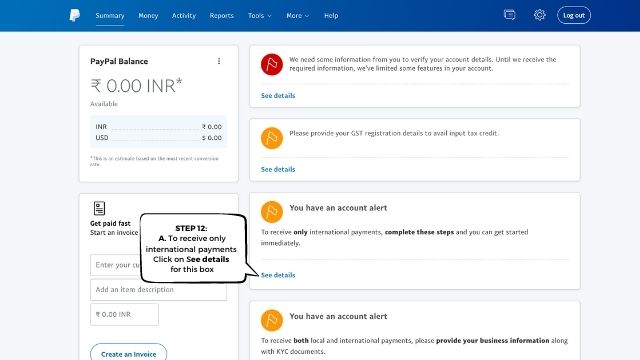
STEP 12
A. If you want to receive only international payments, click on See details on the first account alert box.
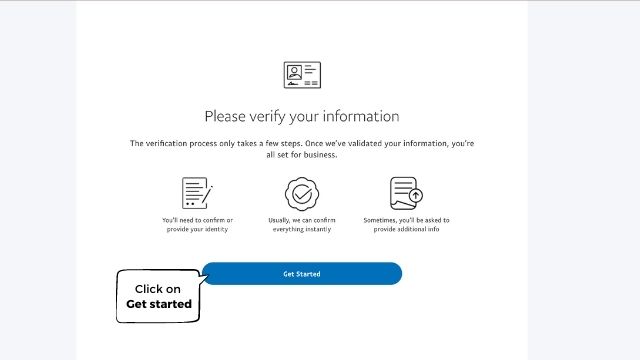
Click on Get Started.
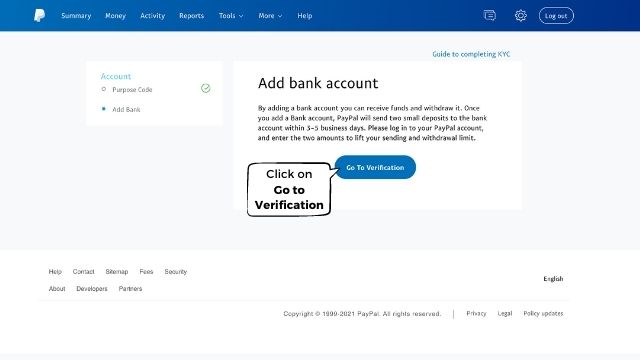
Click on Go to verification.
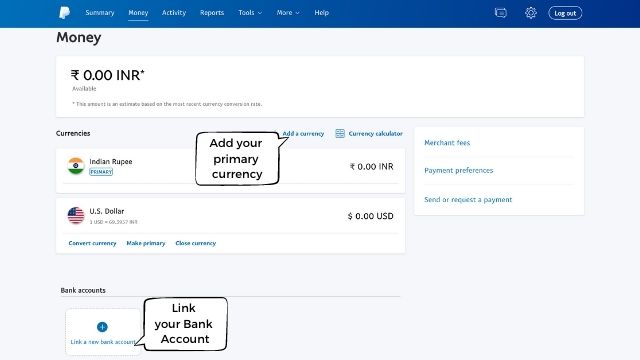
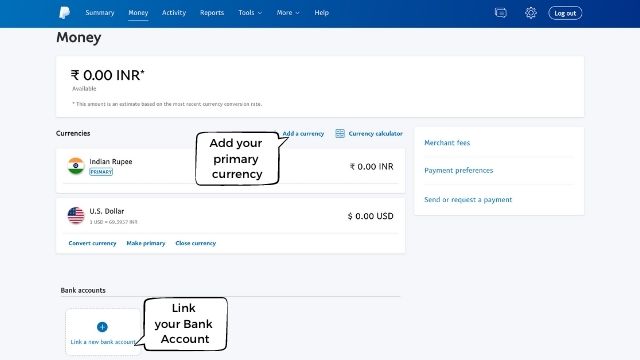
On this page, add your primary currency and link your bank account.
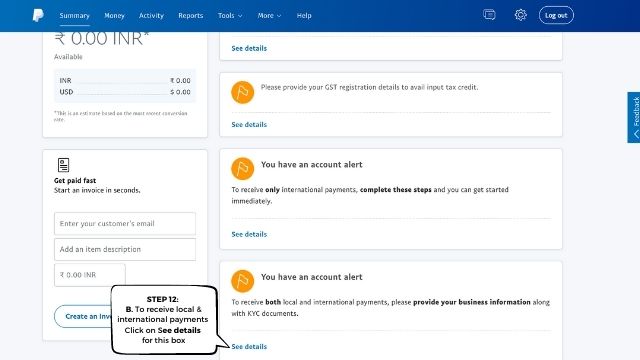
B. If you want to receive both domestic and international payments, click on See details on the second account alert box.
Click on Agree and Get started.
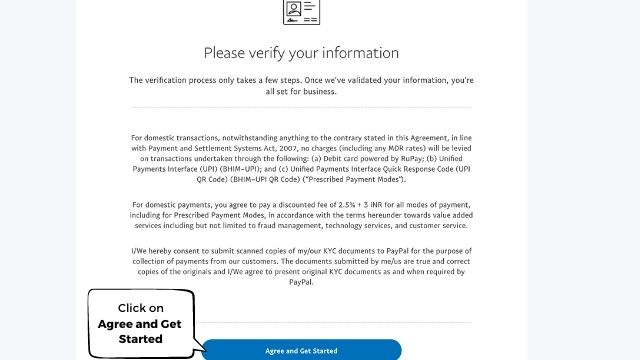
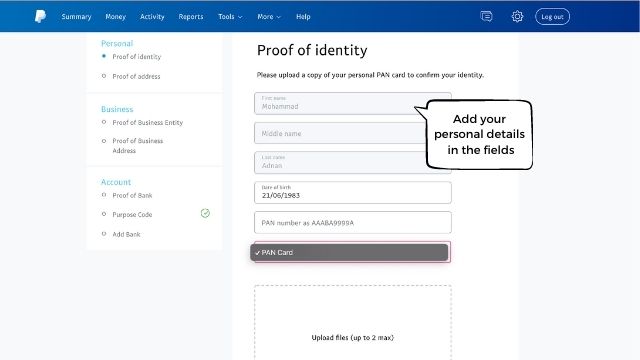
Fill in your personal details and address on the fields as shown in the image below.
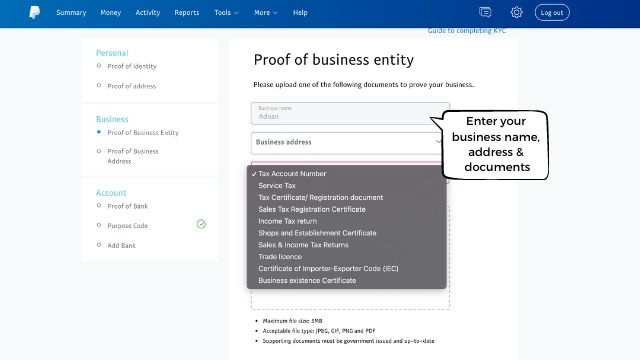
Next, add your business name, address and upload any one of the supporting documents as shown in the image below.
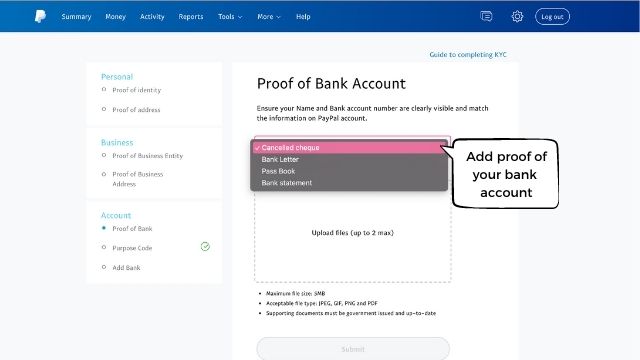
Add proof of your bank account. Upload the photo of your cancelled cheque, bank letter, password or bank statement.
Click on Go to Verification.
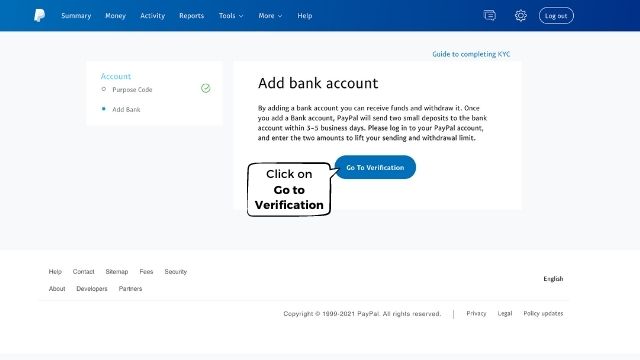
On this page, add your primary currency and link your bank account.
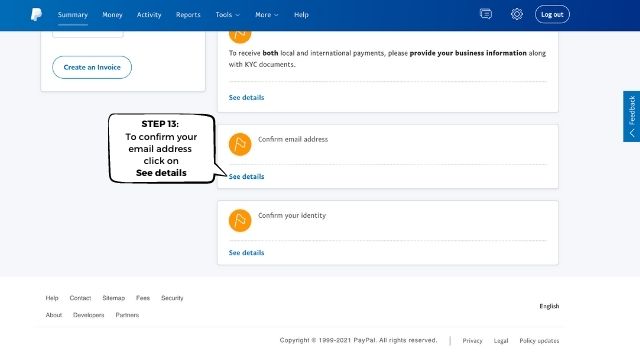
STEP 13
To confirm your email address, click on See details.
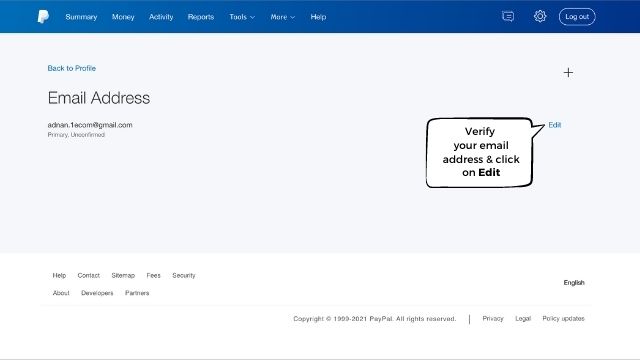
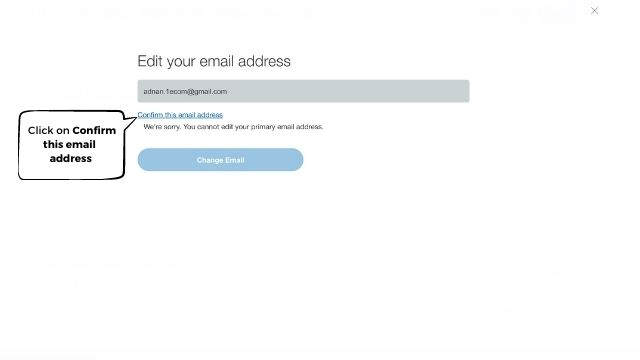
Verify your email address and click on Edit.
Click on Confirm this email address.
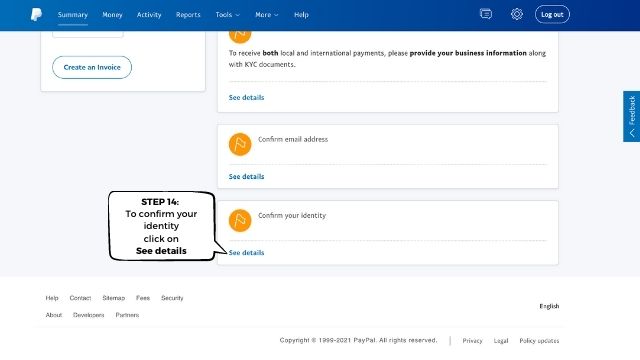
STEP 14
To confirm your identity, click on See details on the confirm identity box.
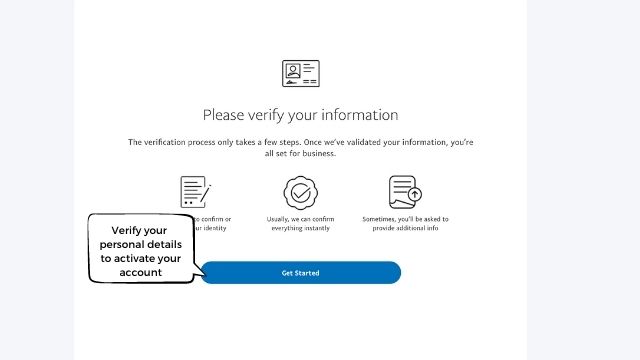
Click on Get Started
Click on Go To Verification.
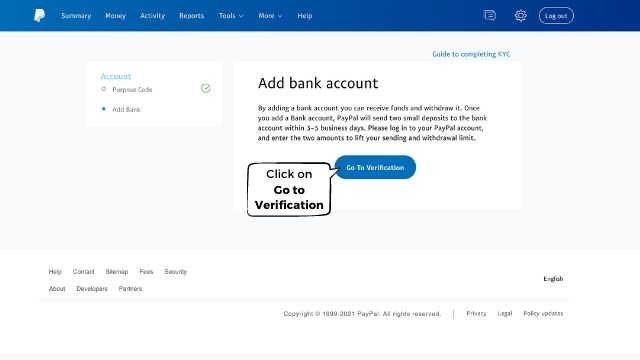
Finally, verify your bank account details.
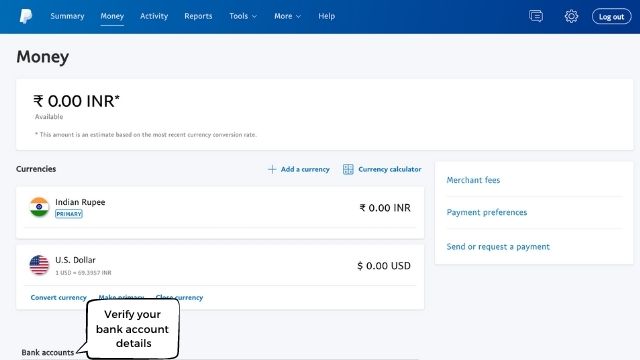
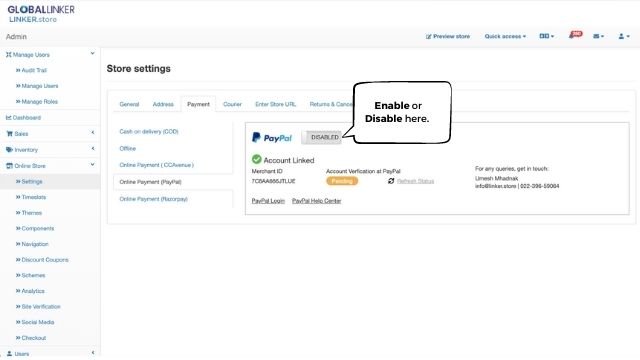
Once you’ve linked your bank account, the PayPal team will review it and your account will be activated. You can choose to 'enable' or 'disable' this payment option for your customers as you please.
For further assistance, write to us at ‘info@linker.store’ or call at +91-22-48931736.
Also read: A step-by-step guide to creating your own eStore with GlobalLinker
Image source: shutterstock.com
Posted by
GlobalLinker StaffWe are a team of experienced industry professionals committed to sharing our knowledge and skills with small & medium enterprises.
View GlobalLinker 's profile
Most read this week


Comments
Share this content
Please login or Register to join the discussion