A Guide to Add Products to Your Linker.store
Ecommerce
219 week ago — 7 min read
Adding products is one of the most critical steps in building your online store. Your products are the lifeblood of your online store and well-showcased products help to win sales.
Let’s explore all the steps involved in adding products to your online store on GlobalLinker’s eCommerce platform – LINKER.store.
There are two ways to add products to your store:
1. Add each product individually
2. Bulk upload products using excel/CSV files
In this article, we will focus on adding products individually. Before you get to this step, ensure you have completed your store setup. Click here for a detailed guide on setting up your store for free.
Once your store setup is complete, follow the below steps.
STEP 1
Log in to your GlobalLinker account.
STEP 2
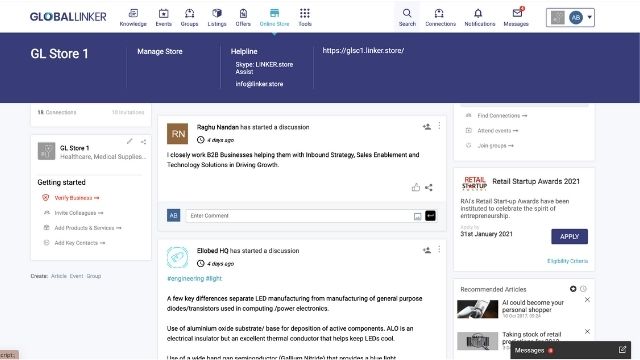
Click on the Online Store button on the top menu. You will see a dropdown. Click on Manage Store to open up your Seller Panel.
STEP 3
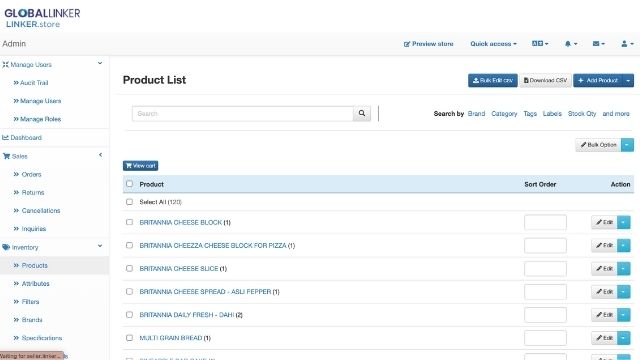
In your Seller Panel, on the left bar, click on Inventory > Products.
STEP 4
On the top right corner, click on Add Product.
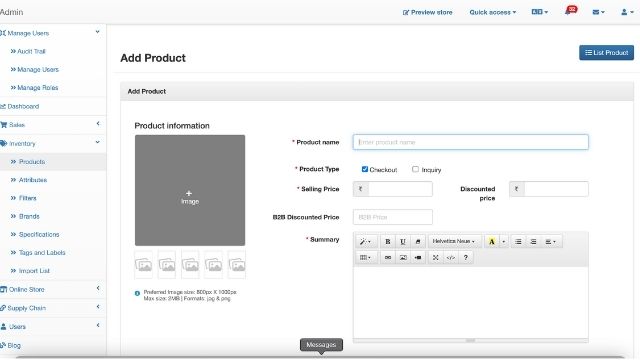
You can start adding products individually, on this page.
Fill in the Product information as explained below.
Product name: Add your product name here.
Selling Price: Enter the product’s selling price.
Discounted Price: If you wish to provide a discount for festivals and other promotions, you can add a discounted price in this field.
E.g., If your selling price is 100, and you want to offer a 20% discount add the discounted price i.e. 80
Note: The discounted price is displayed only if it is less than the selling price.
Image: You can add up to 6 images per product. Recommended dimensions are 800x1000 pixels for portrait images and 1500x1500 pixels for landscape or square images. The maximum size of an image can be 12MB; however, it is recommended to keep the image size as low as possible for your online store to load faster.
Summary: Add quick details on your product for customers to understand what it is in a snapshot.
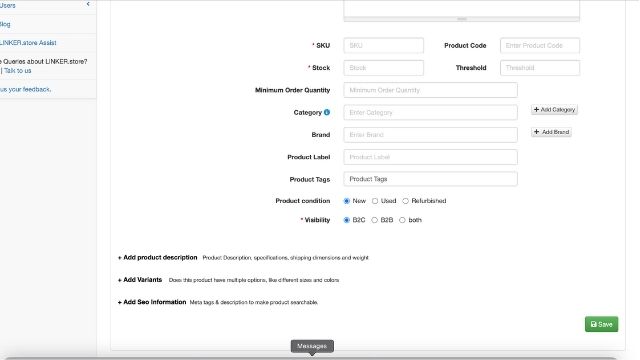
Product Code: A product code is used to identify a type of product. All the variants belonging to the same product will have the same product code.
E.g., for a product name ‘T-Shirt’, if the product code is GRS0102, the different colour and size variants of this product will have the same code.
SKU: If you already have an inventory management system, you can use your own SKU code. Alternatively, you can create one. Remember that each product SKU should be unique. Let's say if there are three sizes in a green T-shirt; each size will have a different SKU code such as GRS0102-S, GRS0102-M, GRS0102-L.
Stock: The number of units you have for the product.
Minimum Order Quantity: This indicates the minimum number of that product that has to be ordered. While adding a product, sellers can specify the minimum order quantity (MOQ) against it.
Category: Categories help you segregate your products and make it easier for your customers to browse through your online store.
E.g., T-shirts can be categorised into men, women, and kids.
If the category already exists in your store, you can type the name and select it from the dropdown. If the category doesn't already exist, create a new category, and select it from the dropdown to assign it to the product.
Brand: Next, you need to add your brand name.
Product Labels: Product labels are used to showcase special products or promote front line products.
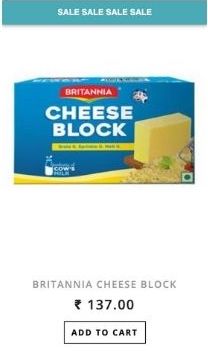
Product Tags: Tags are used to club products together. They form an invisible group of products and are searchable keywords associated with your product. This means when a customer searches for a particular item on your online store, it shows all the products under that tag.
For e.g., If you run an online apparel store, you can choose to use tags to indicate the colour and material of the products, like cotton, linen, denim.
Product Condition: Select the appropriate condition of your product, i.e., new, used, or refurbished.
Product Visibility: The purpose of this field to ensure that your store is visible online as per your choice. If you own a retail and online store, select your visibility as B2C or both, to ensure it is visibility across the internet. If you’re a B2B business, select visibility as B2B so that your products are only visible to your trade partners once they log in with their credentials.
Note: To get started with the trade partners login you to need enable the Supply chain feature, go to the seller panel, under Supply Chain you can activate this feature.
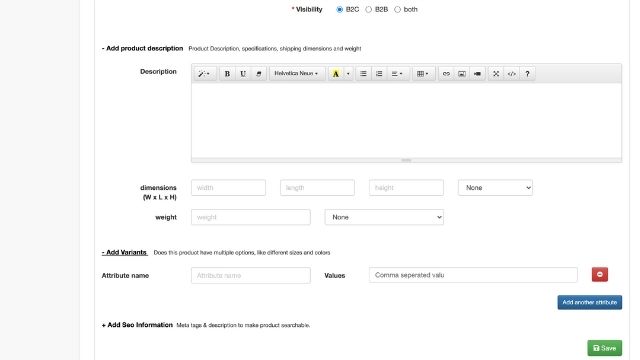
Product Description: This section is to share detailed information about the product. Unlike the summary, which is meant for a brief snapshot, this space is for more elaborate information. It is typically used to highlight features, technical specifications, health benefits, or ‘how to use’ information.
Add Variants
Variants are used to define products that have more than one variety. For e.g., – sizes, colours, etc.
For e.g., A T-shirt can have different colours, or sizes which act as a product variant for that T-shirt.
● Attribute Name: Define the type of your product variation, that is, whether it is by size, colour, weight, RAM, Storage, etc. For example, if a T-shirt is available in different sizes its attribute label will be ‘size’.
● Value: This is used to define the corresponding value of the variant. Continuing on with our example of the T-Shirt, if the Attribute Name is ‘size’, the corresponding Values can be Small, Medium, Large, Extra Large, etc.
Note: As you start typing in the Attribute Value, add a Comma and the system will accept the field. For example, after typing ‘small’, press the comma; the system will accept the value, and a new row will appear below for you to add ‘medium’.
STEP 5
Once you have added all the required information, click on Save and the product will get uploaded.
Repeat this same process for each product.
If you would like to upload a large number of products in one go, utilise the bulk upload feature to save time.
Add products to your online store now and start selling!
For further assistance, write to us at ‘info@linker.store’ or call at +91-22-48931736.
Also read: A step-by step-guide to creating your own eStore with GlobalLinker
Image source: shutterstock.com
Posted by
GlobalLinker StaffWe are a team of experienced industry professionals committed to sharing our knowledge and skills with small & medium enterprises.
View GlobalLinker 's profile
Most read this week
Trending



Comments
Share this content
Please login or Register to join the discussion